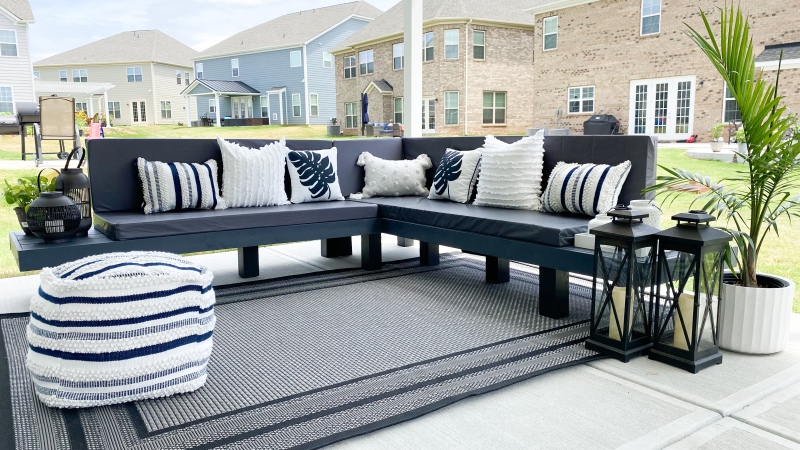
As a part of our backyard makeover, we wanted to change our backyard seating arrangement. As I looked for a couch that I like, I realized they are crazy expensive. The one I loved is about $3500 and I am not ready to pay that amount. So we decided to make one.
Here is how we built it and check out the build plans if you want to make one too.
SHOPPING LIST
- 2″ x 4″ x 8′ pressure treated Lumber – 5
- 1″ X 4″ x 8′ pressure treated Lumber – 9
- 4″ X 4″ X 6′ Ground contact approved Lumber – 2
- 1″ x 6″ x 6′ pressure treated Lumber – 4
- 1″ x 6″ X 8′ pressure treated Lumber – 4
- Solid Exterior stain tinted with colour of your choice – 1/2 Gallon (We used the colour – Dark Slate)
- 8x-4-in Tan Zinc-Plated Exterior Wood Screws
- 8 x 1-1/4-in Black Bronze Exterior Pocket Hole Screws(100-Count)
- Wood filler
TOOLS NEEDED
- Power drill
- Measuring tape
- Miter Saw
- Kreg Jig Set
- Pencil
- Sander or sand paper
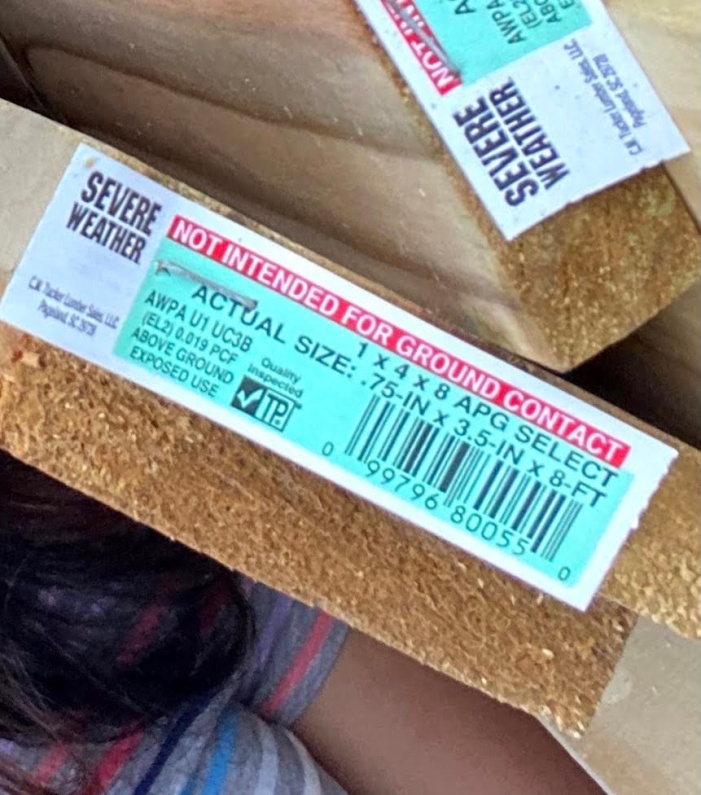
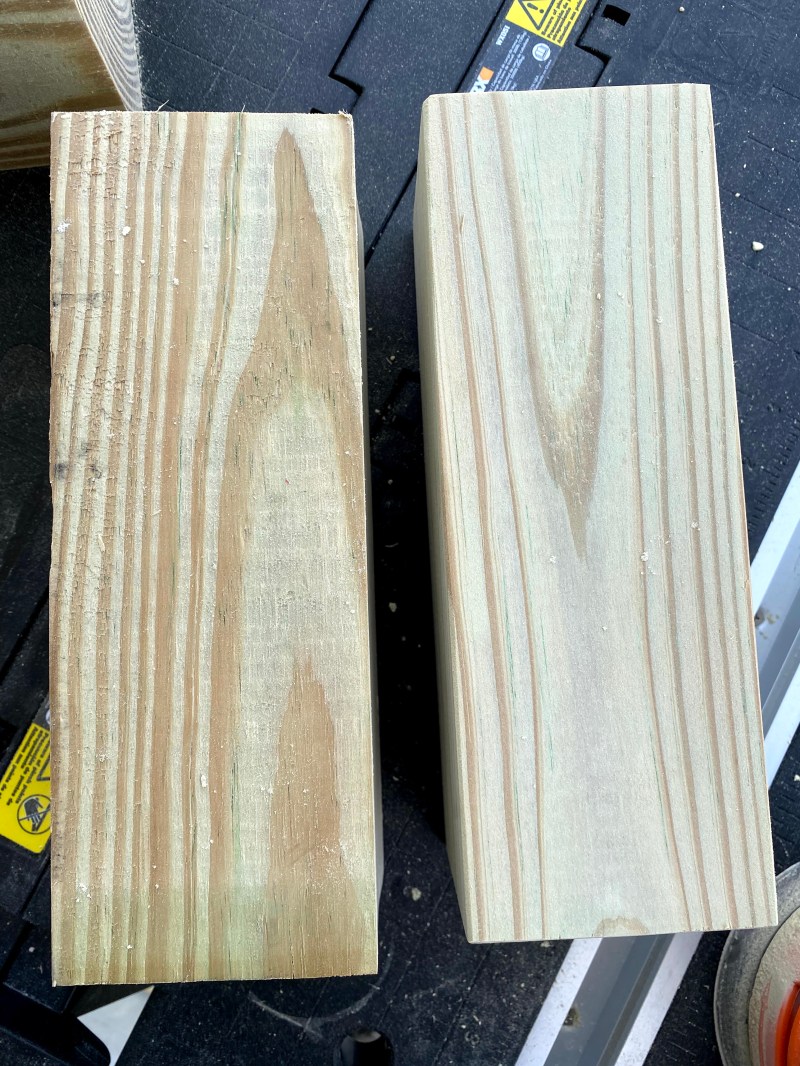
Getting the right Lumber for the project is the most important part. Choose the pressure-treated wood for outdoor projects. You have to make sure you get the wood that is “Approved for Ground contact” for the pieces that actually touch the ground. In this case, we got ground contact approved 4x4s since we will be using them as legs. Everything else is severe weather pressure treated.
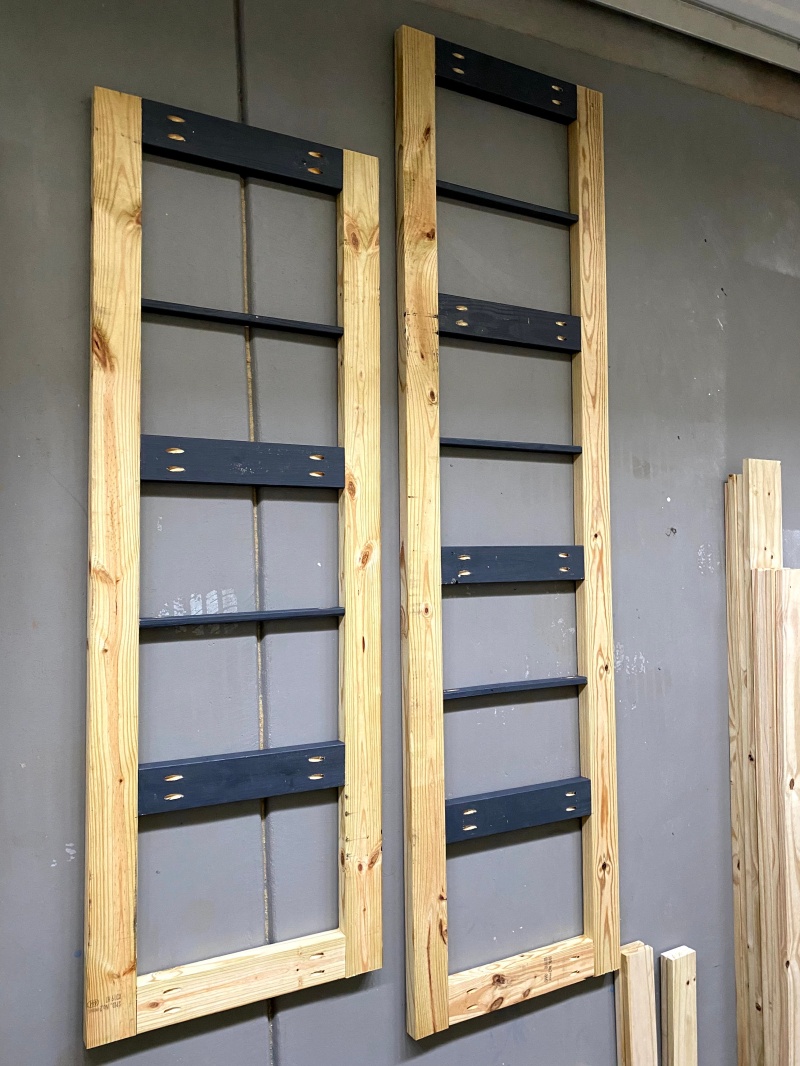
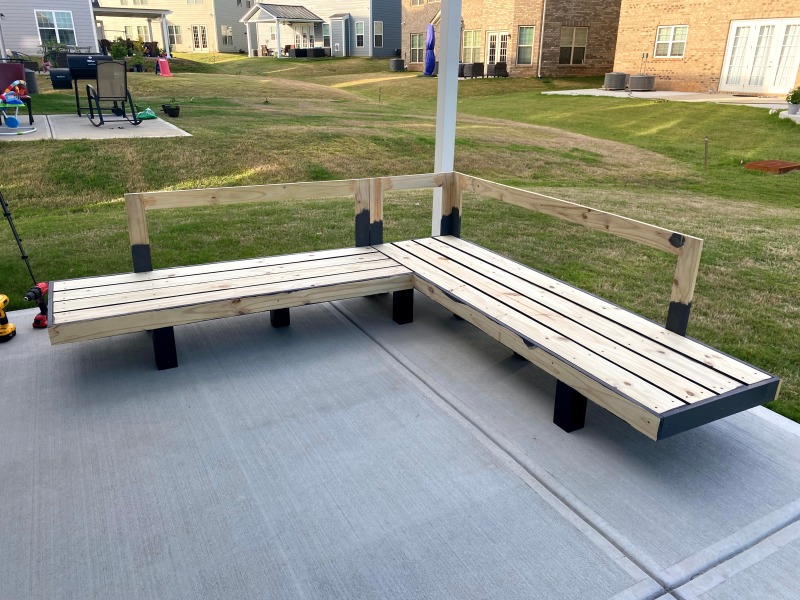
The first step is to build a frame like as shown on right. This frame will be attached to the legs and the 1 x 6 slats will be sitting on this frame. So make sure it is strong enough. We used 2x4s and attached them using a Kreg jig. Drill pocket holes on either side of the middle pieces and attach them to 2x4s on either side. You can use more middle pieces and place them even closer to make this strong. We used a couple 1x2s since we have them on hand. We made 2 such frames(one is 6 feet long and the other is 8 feet) as we want to make an L-shaped sectional couch. Now fill these pocket holes with wood filler of your choice. We used Minwax wood filler
Now we need to get the legs ready. We got those “ground contact approved” 4x4s and cut them using a miter saw. Note that you would need a 10″ Miter saw to cut these. We had a smaller one but it isn’t big enough for the job, so we borrowed a bigger one from a friend. We chose to have a 10″ height for the legs as we want a low-height lounge couch.
Now we sand all the pieces down. We used 180 grit paper on the frame and the legs. The frame will be hidden below the slats so it doesn’t have to be super smooth.
All the other pieces that are visible i.e., 1x6s and 1x4s need to be sanded as smooth as possible. So we used 240 grit and 360 grit to give a smooth finish
We painted the frame and legs first as it will be difficult to reach those once assembled. For outdoor furniture, it is always good to stain/paint on all sides, even though they won’t be visible. It will act as a protective layer in those severe weather conditions.
We used Cabot solid stain of Dark slate color which as also a sealer.
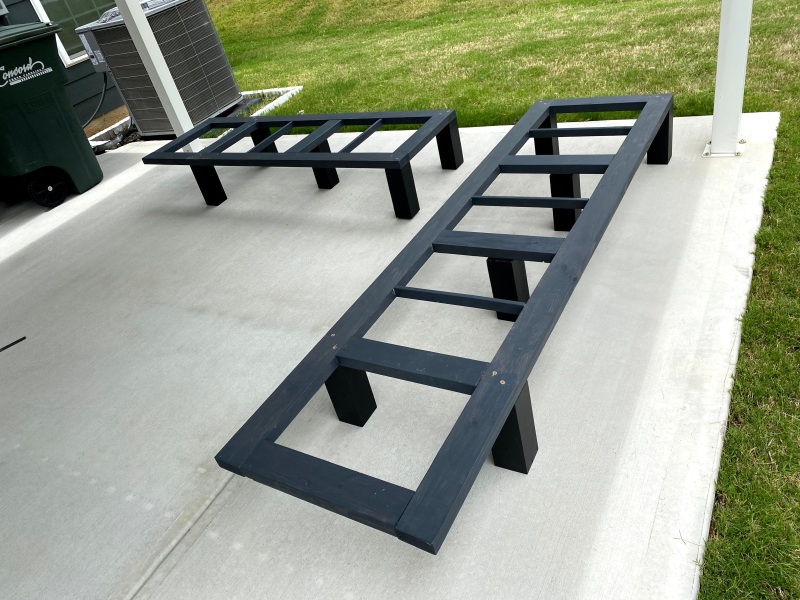
Now attach the frame on the legs using 4″ exterior grade screws. We wanted to have an overhang on the edge of the frame, to use it as a side table. So, we placed legs 16″ away from the outer edge. The cushion will stop there as you can see in the final image.
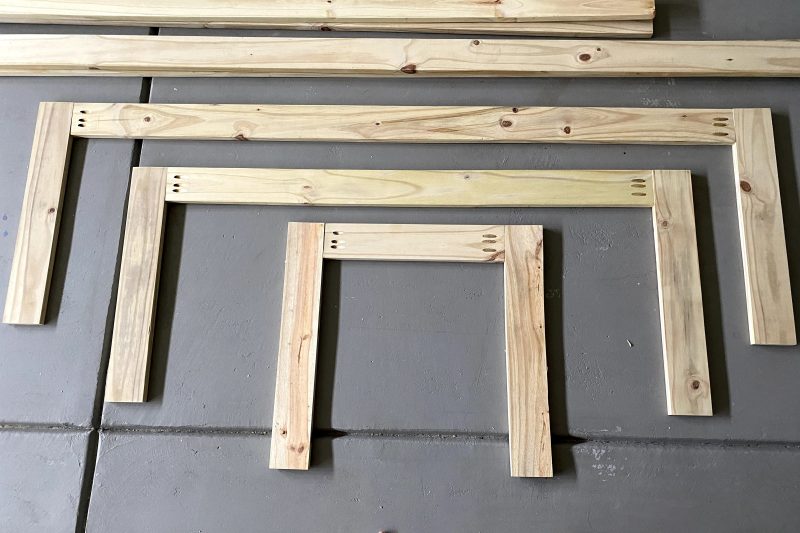
Now let’s get to back frames. The back frames will be attached to the legs. We made a simple U shaped frame using 1x4s. I would highly recommend using 2x4s here in case you don’t plan on using thick cushion. 1×4 felt a little weak if use some pressure. We used pocked holes here too for 1 1/4″ screws
To get the measurements of the back frame, measure the distance between the legs on the back of the couch. The frame width of the corner piece is tricky. Make the frames overlap on the corner to give a neat look.
Now, we can attach these to the legs. Choose the height at which you want the back frame to be. We wanted it to be 15″ from the seat. To support the back frame while screwing it in, we clamped a 2×4 block to the leg as shown below. Now you can screw the 1×4 to the leg.
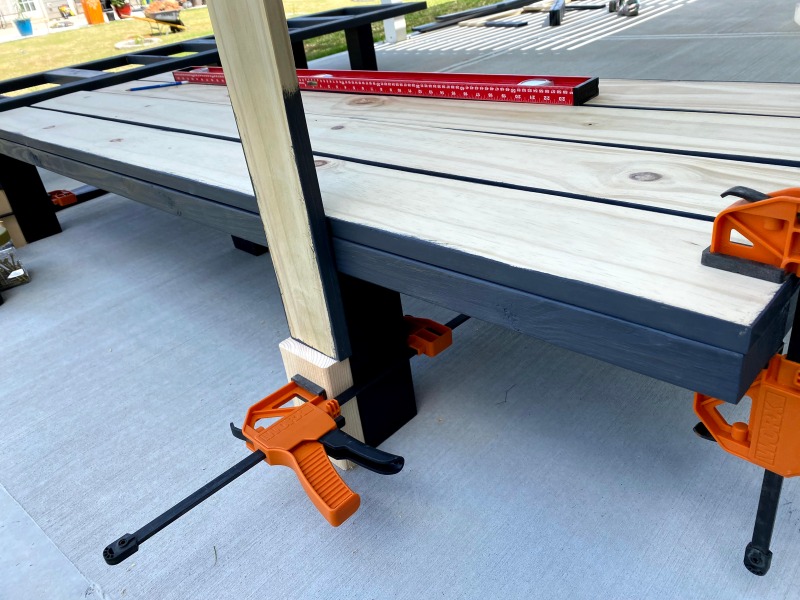
Now it’s time to add the slats!! Just place the slats on the base frame and space them evenly. Then screw it to the 2x4s on the frame.
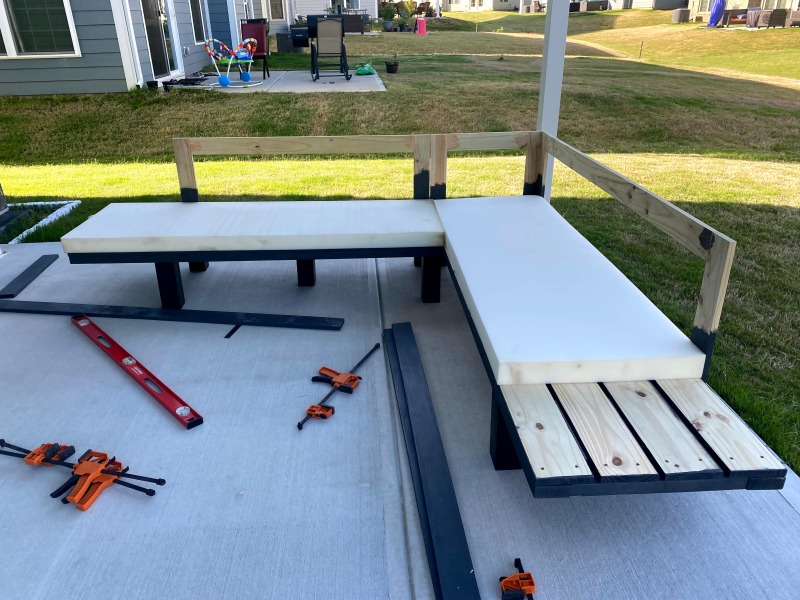
Final part is the outer frame. Add 1x4s on all sides of the couch. Measure the distance between the legs of the back frame while adding an outer frame in the back, between the legs of the back rest frame.
Fill all the screw holes with wood filler and do one final sanding before painting.
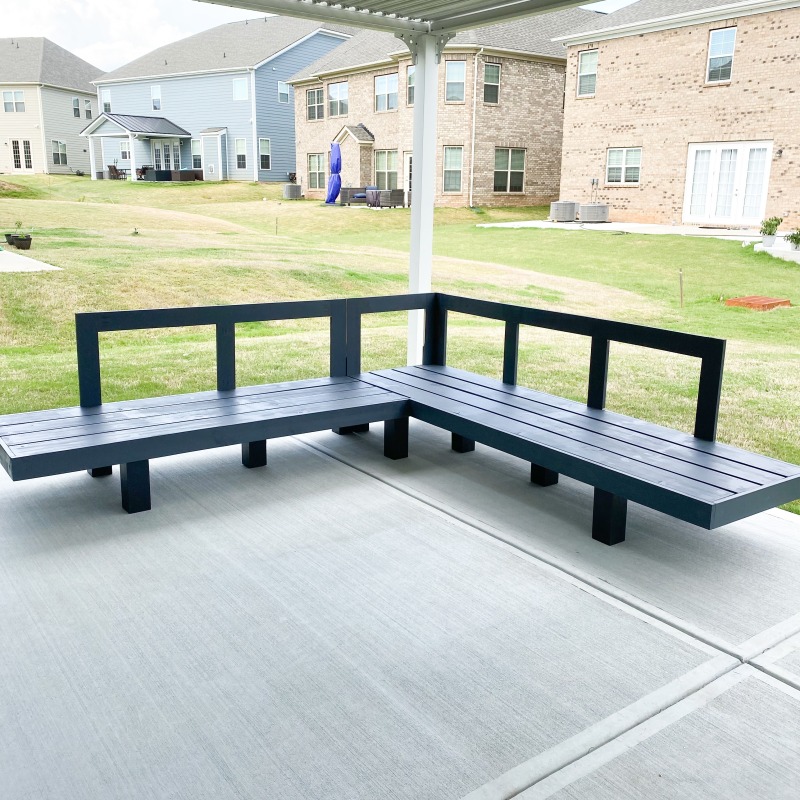
Now you paint everything using a roller. The paintbrush shows the bristles, s we went with a roller. A paint sprayer would give a better finish.
Now add some cushions and decorate! I will soon be uploading a blog on how to DIY the outdoor cushions. Until then let’s keep creating!!